![[Docker] How to Set up Postfix Containers and Send Emails From WordPress in Docker](https://www.wpdiaries.com/wp-content/uploads/2020/07/smtp-150x150.jpg)
![[VirtualBox] Configure an Ubuntu 24.04 / 22.04 Virtual Machine for Web Development (Complete Guide)](https://www.wpdiaries.com/wp-content/uploads/2020/09/local-development-environment-150x150.jpg)
This article describes creating a virtual machine in VirtualBox 6. If you are interested in VirtualBox 7, please see section 1 of this article instead.
First, you need to install the Oracle VirtualBox.
On macOS Big Sur I’ve installed version 6.1.16. Still, on macOS Catalina and Windows 10, I installed version 6.1.2 which was available from the older builds on the VirtualBox official site. Because I had some performance problems with version 6.1.12 (version 6.1.12 was the latest version at the time of this article’s initial writing).
The installation of Oracle VirtualBox is pretty straightforward. You will have an exe-file for Windows or a dmg-file for macOS. Just run the installer and follow the instructions.
When the VirtualBox software has been installed, you’ll need to create a new virtual machine. It’s a little bit less evident. So let’s consider it.
I’ll show it for a Mac computer. But for Windows, it is the same.
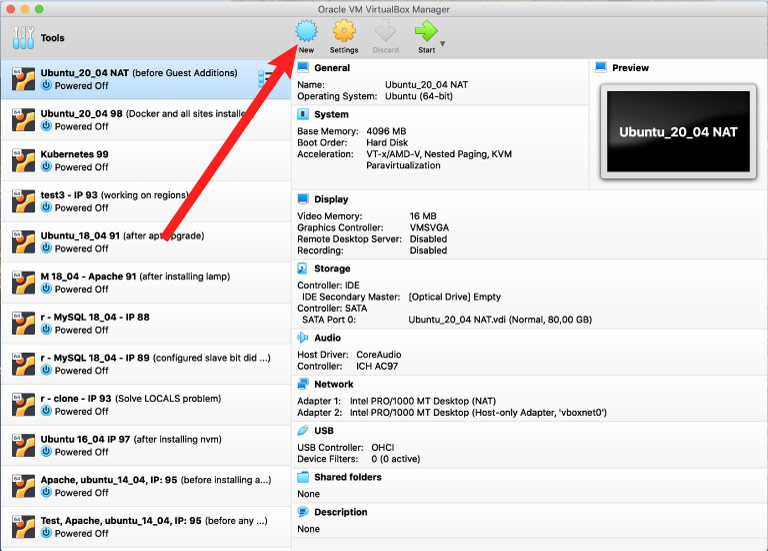
1. To create a virtual machine, run the Oracle VirtualBox and click the button ![]() New:
New:
2. In a window that opens, enter the virtual machine name, select the operating system, and click Continue:
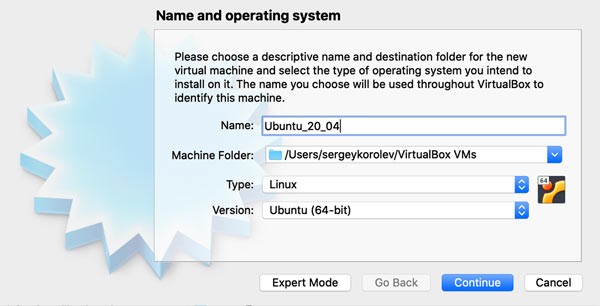
In this example, we are considering creating a new VM for Ubuntu. If you are creating a virtual machine for a different operating system, choose a different Type and Version.
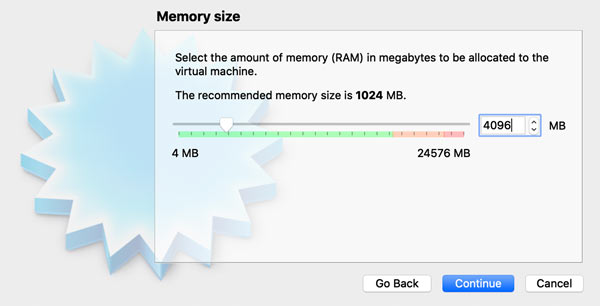
3. On the next screen, set the RAM for the virtual machine. The default is 1 GB. I usually set it to 4 GB. It depends on how much memory you have on the host machine and how much you are willing to spare. In any case, you’ll be able to increase or decrease the virtual machine’s RAM after it has been created.
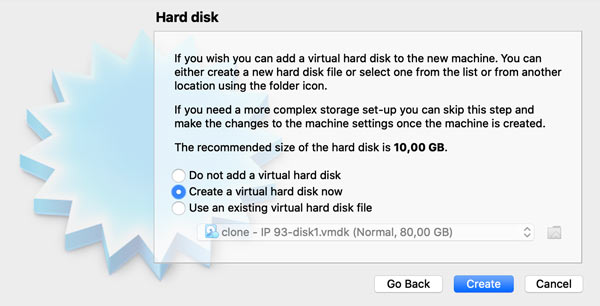
4. Then you’ll need to choose the Create the virtual hard disk now option, which is the default:
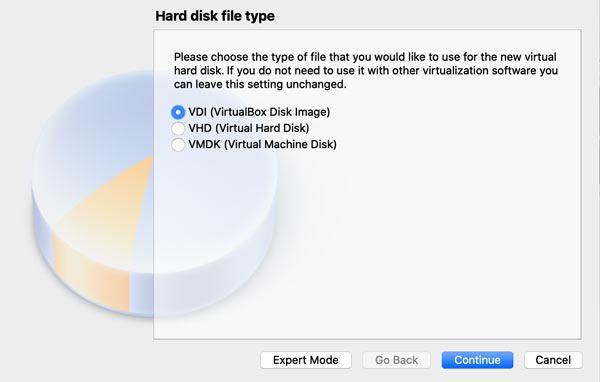
5. Next, you’ll be asked to choose the virtual disk file type. I keep it at the default setting, which is VDI:
6. Next, I always choose to make the hard disk Dynamically allocated. This allows me to set the disk size to a larger value, for example, 100 GB. But initially, the disk will be small — the virtual machine won’t take up much space on the host machine’s hard disk. And additional space will be allocated as needed.

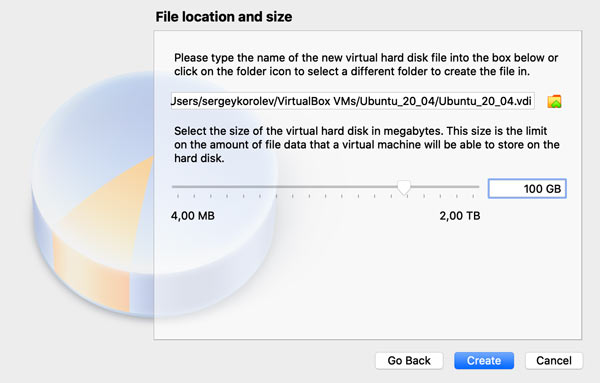
7. Finally, set the virtual hard disk file size. I usually set it to a larger value, like 100 GB, since I always use a dynamically allocated disk (which means it will start small and grow as needed). You never know how much additional space you’ll need. So I find it convenient to set the disk size large enough.
8. Now we need to install the Ubuntu operating system. First, download the Ubuntu 22.04 Server .iso image. You can do this here (or just Google for “Ubuntu Server download”).
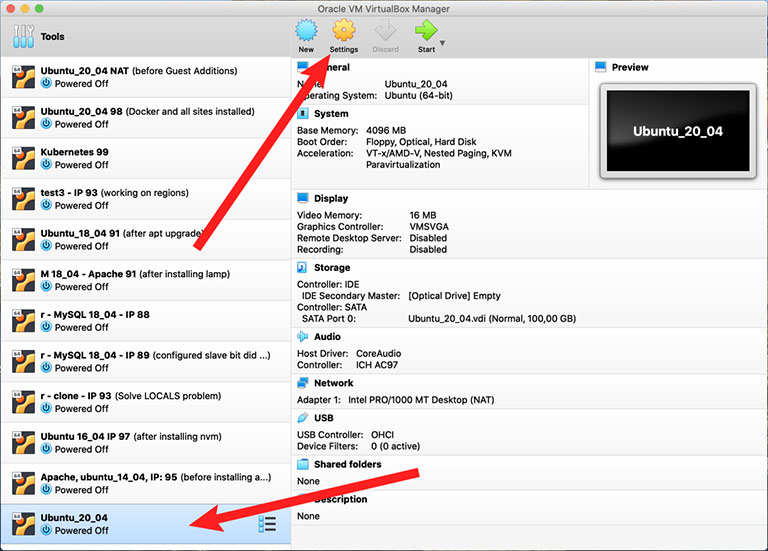
After downloading the .iso image, select your newly created virtual machine in the left panel and click the Settings button ![]() :
:
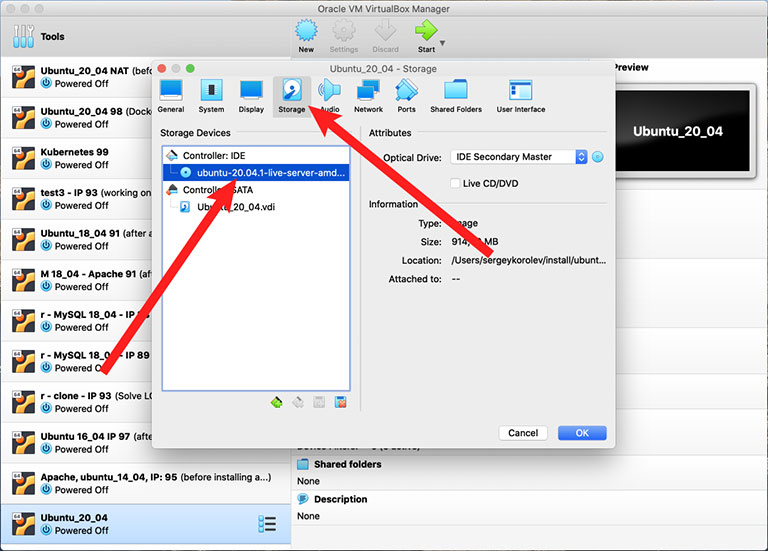
In the window that opens, select the Storage tab. Then, add the .iso file to the virtual machine’s optical drive:
Also, make sure the virtual machine is set to boot from the CD-ROM first. This is done on the System tab of the same Settings window, and it is the default boot sequence.
9. Now, when you ![]() start your virtual machine, the Ubuntu 22.04 installation from the virtual CD-ROM will begin.
start your virtual machine, the Ubuntu 22.04 installation from the virtual CD-ROM will begin.
Conclusion
Thank you for reading this article.
This was originally a part of the article “[VirtualBox] Configure an Ubuntu 22.04 / 20.04 Virtual Machine for Web Development (Complete Guide).” But after I’ve updated section 1 of the article with information relevant to VirtualBox 7, I moved the steps for creating a virtual machine in VirtualBox 6 to a separate post. In case it might still be of interest to anyone.
If you are on VirtualBox 7, please see the updated material.
If you have any comments, please post them below. I am always happy to hear from you!